Showing posts with label recipe. Show all posts

04 October 2013

pumpkin gingerbread bites; or how minor tweaks make all the difference

this time last year, just like everyone else, I was waxing poetic on the effusion of pumpkin flavored consumables before the weather even turned chilly. I had turned my grandmother's old fashioned gingerbread recipe into one with pumpkin, and the gingerbread into cupcakes. Just three days ago, I hit a jackpot in the recipe tweaking stakes.

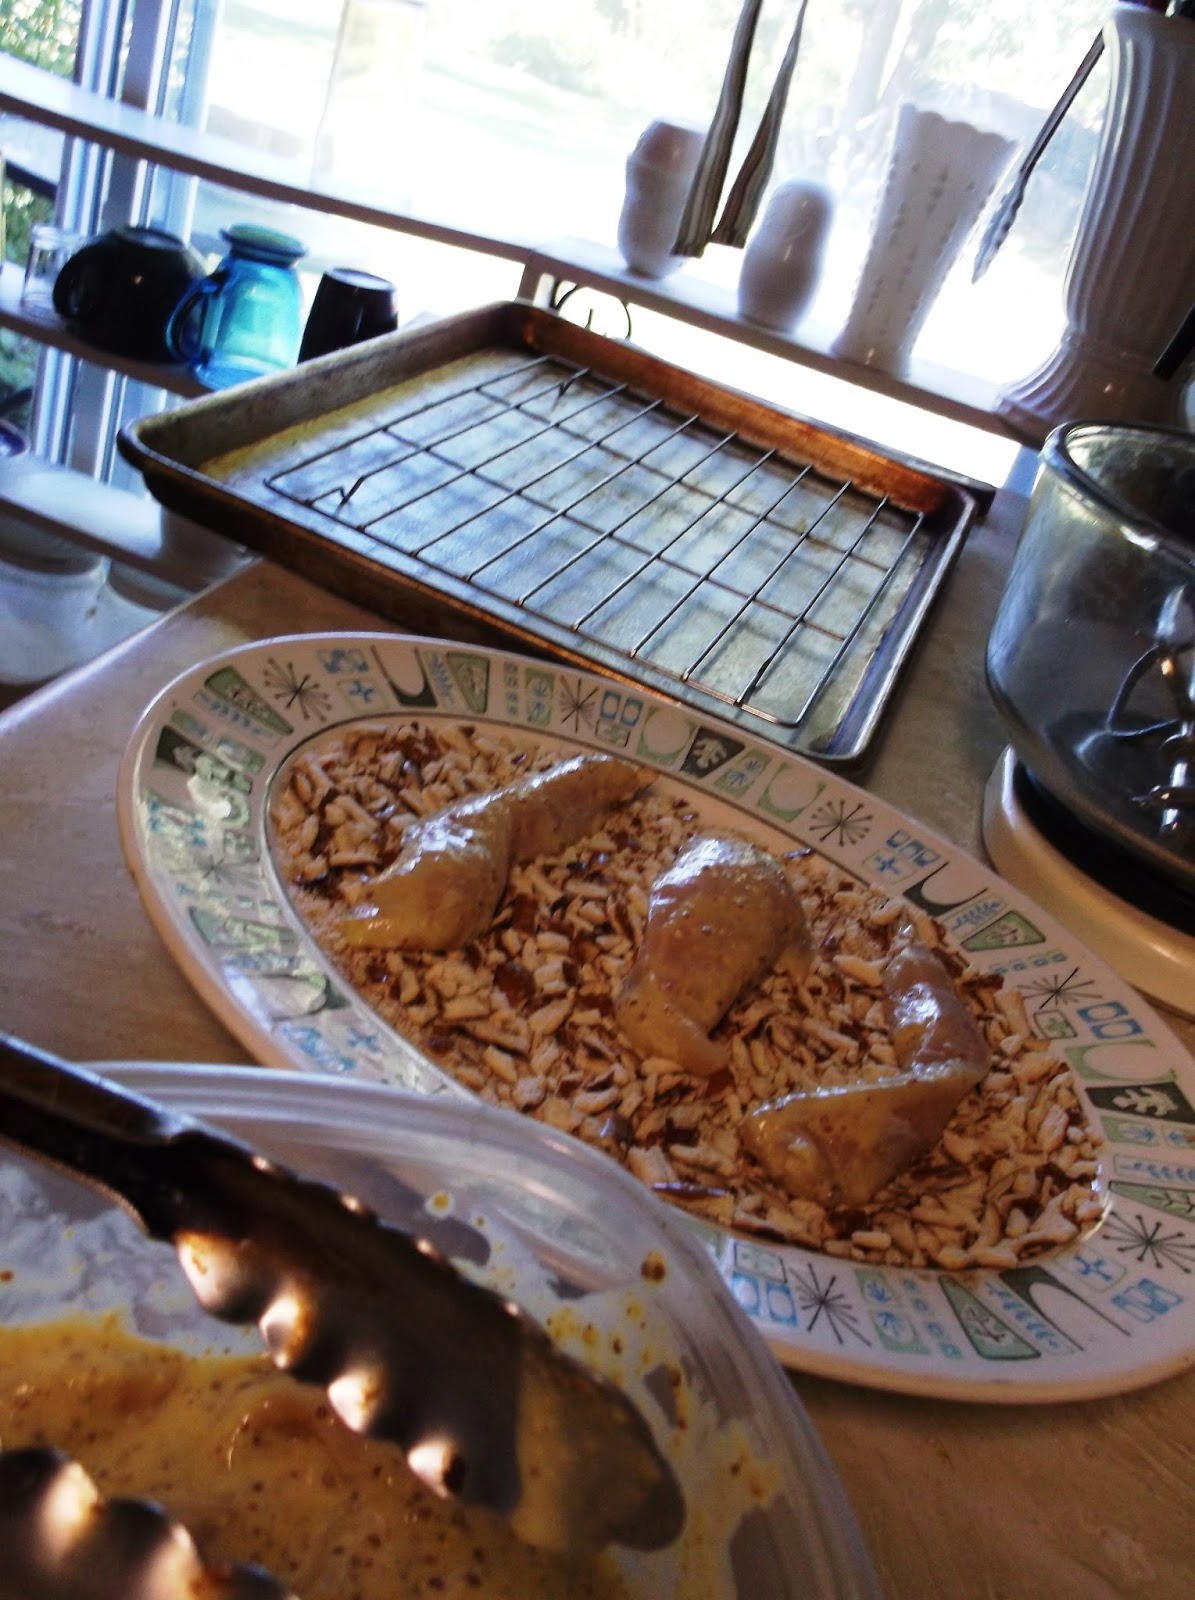
As I approach thirty, I have become more aware both of a desire for sweets and my body's decision that sugar is a bad idea. I hate the idea of obsessing over calories. It seems preposterous and counter-intuitive. Still, I work on adding a bit more protein and a bit less sugar and fat and a bit less of processed, prepackaged foods to my life. As such, I eat a lot of Greek yogurt and add it to quite a lot of stuff {in maybe a marinade for movie-night chicken, or possibly an updated, moist chocolate cake, or a layer cake covered in almonds, pantry cleaning blueberry muffins, or as a replacement for sour cream on top of spicy chili or lentil soups}.

There's been a craving for something sweet and spicy and richly dark flavored happening at my house. I'm not insistant on pumking this time of year, but I picked up some apple cider and hit upon the perfect combination of flavors for the best hot cider I ever managed to make this fall.

That's the sort of to do lists I like: 1. figure out hot apple cider, 2. learn to make croissants, 3. take Pepper for hikes in the woods, 4. conquer contouring powder, 5. finally finish Shelby Foote's The Civil War trilogy, 6. moon over Tom Hiddleston in The Hollow Crown...but I digress.

Though I will sort out the proportions for a recipe here, the apple cider has led me down a rabbit hole of "what else can I add apple cider to?" Then inspiration slammed down on me like an anvil in a cartoon. Pumpkin gingerbread is lacking only one classic autumnal ingredient: apple cider.

Though I barely adapted my earlier pumpkin gingerbread recipe, this one is a bit lese dense, but with a wonderful almost custardy center. I have made some tweaks in mixing as well. I think it becomes simpler this way. As per usual, I mixed by hand but feel free to use a mixer if you need.


Pumpkin Gingerbread Bites
1/4 cup brown sugar
1/4 cup Greek yogurt
pinch salt
1 egg
1 {15 oz} can pumpkin (not pumpkin pie filling)
1/2 cup molasses

1 and 1/2 cup white flour
1/2 teaspoons ground ginger
dash ground cinnamon
1/2 teaspoon ground nutmeg
1 teaspoon baking soda
1/4 teaspoon baking powder

1/4 to 1/2 cup apple cider


mix sugar and salt and yogurt, then beat the egg well into the mixture. Next, stir or whisk in the pumpkin, then the molasses. Top with the dry ingredients, then mix to combine. Add the appropriate amount of cider, in portions, to make the batter a traditional cake batter consistency.
For small bites, dollop {I like a cookie scoop, though a soup spoon or tablespoon measure will work just as well} the batter into a well greased tassie or mini muffin pan {will make about 48 mini bites or 24 regular cupcakes}
Bake in a preheated 350 degree oven for 10-15 minutes, or until an inserted toothpick comes out clean. Once done, remove from oven and gently pick each bite out of the pan while still impossibly hot. For ease, feel free to use the appropriately sized paper liners, but I like the looks of the mini bites liner-free.
Allow to cool on a rack, then dust with powdered sugar or serve with a dollop of whipped cream, or eat with no garnish at all.


"Be well. Do good work. Keep in touch." - Garrison Keillor

09 September 2013

pretzel-crusted chicken, or grown-up kids' food

the other night one of my friends came over, and we re-created a movie theater smorgasboard right on my coffee table. We had Milk Duds, Twizzlers, m'n'm's, Whoppers, Bit o'Honeys, sour watermelon gummies, Tootsie Rolls, homemade popcorn with butter salt...everything a kid could ask for at the movies.

Because we are also adults who cannot subsist on candy alone, I wanted a protein that doubled as something fun. Trolling through Pinterest and Googling "movie snacks," I came across the idea of chicken baked with a pretzel crust. Not only did it sound rather like fried chicken tenders, the baking felt more healthy and allowed me to pop something in the oven and forget about it without much hassle.

Some of the recipes called for a mustard salad dressing style marinade, but I wanted something a bit more oil-free. Instead of putting the chicken strips into essentially oil with mustards, I tossed together my favorite mustards and stirred in some Greek yogurt. The same friend who came over has made a mayonnaise dressed chicken, rolled in crushed corn flake cereal and baked. It's crunchy and delicious.

This riff on pretzels and mustard and her mayo chicken brought me to a tender, juicy, crunchy, grown-up kids' version of chicken tenders. It was exactly what I wanted, and really quite easy, the two things best found in a recipe.


Pretzel-Crusted Chicken Strips
2 chicken breasts (or more depending on the number to be served), cut into 1.5" strips

2 tablespoons sweet mustard (I used Bavarian sweet, but choose the mustard in your cupboard)
2 tablespoons spicy mustard (preferably whole grain, again choose the mustard in your cupboard)
2 tablespoons standard yellow mustard
3 tablespoons Greek yogurt
2 tablespoons honey
3 tablespoons water

1 cup crushed (by hand or with rolling pin) pretzels, large stick or sourdough

mix together the mustards and yogurt, then remove two or three tablespoons of the mix into a small bowl for later dipping. To that bowl mix in the honey and keep the dipping sauce in the refrigerator. Add the water to the remainder of the marinade mix, then add chicken. Ensure the mix coats the chicken entirely, then remove to the fridge for at least a half hour but up to four hours.
Preheat your oven to 400 degrees. Crush the pretzels into small and fine pieces and place into a shallow dish. Dredge each chicken piece in the pretzels for a fairly even coating of pretzel breading. Place the chicken strips on a cooking rake, which is set in a greased cookie sheet. Bake for 10-20 minutes, until the outer coating is crisp and the chicken's internal temperature is 165 degrees (as per the directions of US FDA).
Serve alongside the dipping sauce and enjoy.


  "Be well. Do good work. Keep in touch." - Garrison Keillor

29 August 2013

summer's ending; or how to let Peach Cobbler make you a star

though this weekend is a long one here in the States, and Labor Day traditionally means the end of summer and that school has begun, it is only the start of peach season. We've had about two or three weeks since the best of the Chambersburg peaches have made their way westward across Pennsylvania.

Even though Georgia is renown for its delicious peaches, my family has always been partial to those grown in south central Pennsylvania. Known as Chambersburg peaches, they are nearly always of a high quality, firm of flesh, sweet, and powerfully peachy. All that, and they are easy to find in local farmers' markets here in Western Pennsylvania. I bought a half bushel this past Saturday for $25.

15 April 2013

decay; or how the natural progression of bananas turns into banana bread

we are a family of green banana eaters, of spotted banana eaters, of a banana eating dog. {this is his "can I have a bite of your banana?" face}

Yet, we always have bananas about to go to waste. It stems at least partially of my mother & I's love of green green bananas. If they're yellow, we eat only begrudgingly. If there are sugar spots {the actual name for those disfiguring, horrible brown spots}, it just isn't happening.

My father loves the ones with the sugar spots. If the banana has even a hint of green or isn't beginning to spot just a little, he is not eating it. You would imagine that we'd then live in a happy little banana nirvana, mom & I eating until dad found the bananas palatable. Alas, you'd be wrong. If mom & I don't eat all the bananas first, there is a waiting period of a day or two between our target banana texture and flavor and dad's. In that day or two, bananas are often forgotten, laying, languishing on the shelf under the bread cabinet.

It is an ignoble end for a tasty fruit, and one that can be stopped at any moment. It is just as easy to mash a banana with the back of a fork and toss it into bread batter as it is to put that mashed banana into a container in the freezer or throw it away. Frozen bananas can be defrosted and baked into bread or added to vanilla pudding or blended in a smoothie.

April is the sort of time of year when it can be warm and sunny one day and cold and rainy the next. This bread works wonderfully as a mood enhancer while still in the oven, manages to make a dreary afternoon brighter with coffee or tea, and makes an excellent breakfast on the go, toasted and slathered with butter, cinnamon & sugar or even peanut butter for an Elvis twist. Give away the second loaf, or wrap it in plastic wrap and freeze until you need another pick-me-up. Later in the summer, this recipe can be gently adapted for Zucchini Bread.


Banana Bread (two loaves)
at least 2 and as many as 4 or 5 bananas, mashed

1/2 cup butter, softened
1 cup brown sugar
2 eggs
vanilla

2 and 1/2 cups flour
1 teaspoon baking soda
1 teaspoon baking powder
1/2 teaspoon salt

1/2 cup chopped roughly chopped pecans or walnuts (if desired)

Mash at least two if not four very ripe bananas in a bowl or plate and set aside. In a large mixing bowl, cream together the sugars and butter, then add the mashed bananas, eggs, milk mixture and vanilla individually. Next add the dry ingredients. Scale up the flour if your batter appears rather wet. You want a thick muffin batter consistency.
Once the batter is combined, divide evenly and pour into two sprayed/greased glass loaf pans {9x3.5x5 or so}. Sprinkle the nuts on top of each loaf pan of batter, pressing them gently onto the top.
Bake in a preheated 300 degree oven for 90 minutes. yes, this is the longest banana bread recipe known to man. You will still enjoy it, especially the scent of bananas and toasted nuts filling your home.

{apologies for the continued use of my Instagram feed for recipe photos. Soon enough, I'll return to my pretend proper photography of food. Until then, we're cooking and eating too quickly to pause for documentation}

"Be well. Do good work. Keep in touch." - Garrison Keillor

08 April 2013

tomatoes; or getting the best pasta sauce out of the not best tomatoes

the whole local only food movement is a great one, but puzzling. How precisely are a large percentage of Americans to eat fruits and vegtables when they either {or both} live in non-farming metropolitan areas or the weather does not allow for a growing season 6-8 months of the year? Especially this year. Snow began in October and was still coming down outside my window this past Wednesday.

The ground is still hard and bare and even grass is finding it difficult to grow. There are a few nurseries operating their greenhouses, but they're mainly supplying pretty plants not food ones. In a larger population center {my address is a village of maybe 250 people, but that actual place is three miles from my home} there is a far better selection of food brought in, but that's not exactly within the required 30 to 50 or is it100 miles locavores suggest. Besides, the California strawberries and the Mexican blackberries at my stores are cheaper than the ones in the growing season. That and the fact that this rural area really doesn't farm means locals are stuck without options, even in summer.

We could all be growing our food. My neighbor raises and butchers hogs. His heifer just dropped her calf yesterday morning. We'll have pig and cow when he butchers them. But when it comes to veg, we're lucky if that same neighbor {a retired roofer who farms for fun and keeps house when his wife is at work} plants some sweet corn. We've attempted gardening at least once every three years since I can remember. The store's busy season doesn't allow for it.

There are some farmer's markets and friends who garden, but often those farmer's markets are stocked with items grown in Ohio or New York or clear across the state, more than the requisite locavore distance for food to have traveled. As such, I just don't care whether my food is local or not. I'd prefer it, but I've become far more worried about how much it's been processed before it hits my plate.

I'm nearly to the point where I only buy "whole" foods. Is it a piece of chicken? ok, then. Is it in a freezer bag, with enticing comments suggesting it is an easy appetizer? no thanks. Are there ingredients listed that I'm not sure I can pronounce but mean that the jarred whatever will last until 2025? nope. Is it a piece of fruit or veg that with a tiny bit of coaxing will taste delicious? I'm on board, season or no.

So, when whole tomatoes are in the grocery store and maybe they're from California or Central America {the same for early green beans and asparagus because I'm dying for any tiny bit of spring by now}, I'm still buying them. I'm buying out of season, out of country tomatoes and pretending it is spring.

This sauce and pasta will take just under 30 minutes, making it perfect for a thrown together meal that feels far more nuanced than opening a jar and microwaving it.


Simple Thyme Tomato Sauce, with Vegetables {scale up to serve 4, down to serve 1}
3-4 tablespooons olive oil
2 to 4 cloves garlic, smashed and peeled
pinch of dried rosemary, bruised
1 teaspoon dried thyme
2 to 8 Roma tomatoes, quartered (1 to 3 standard tomatoes, depending on size)
salt & pepper to taste
1/4 to 1/3 cup wine
1 teaspoon to 1 tablespoon sugar
1/2 to 1 cup each, asparagus and green beans, cut into bite sized pieces
1/4 lemon

pour the oil into a cold pan, turn on low heat and add the garlic and herbs. Allow spices to meld for five or ten minutes, depending on how much time you have until service. After the appropriate time, turn pan to medium-high heat and add the tomatoes, salt and pepper. Cover and allow to simmer for 5 minutes, tossing occasionally. After five minutes, gently press the tomatoes with the back of a spoon, then add the wine (I prefer rose for this, though anything you'd like to drink with the meal works) and sugar. Taste for flavor, then reduce heat to low and allow to simmer to a thick sauce, usually about ten minutes.
Meanwhile, you should have heated salted water to a boil and been cooking your favorite pasta. When the pasta is two minutes from al dente, toss the asparagus and green beans into the sauce, increasing the heat back to medium-high. Then add the nearly cooked pasta (I prefer penne or gnocchi for this sauce but whatever you like is best) along with pasta water, if necessary, and the lemon juice. You're looking for a sauce that will soak into the pasta as it cooks for the final two minutes, but not so soppy that it will pool or run on your plate. Cook sauce, veg, and pasta until the sauce is desired thickness and the veg and pasta are done.
I prefer my asparagus and green beans to be lightly cooked. This method cooks them for five minutes or less. If you prefer a more tender and not at all crunchy veg, add it earlier before adding the pasta. Serve with some grated cheese, good bread, and possibly a salad and/or grilled meat.
Feel free, also, to omit or substitute the green beans and asparagus. Neither is required, but their addition makes it easier to get away without adding any sides.

"Be well. Do good work. Keep in touch." - Garrison Keillor

14 November 2012

thanksgiving; or how eggnog sugar cookies hit the spot

there is flour on my shoes & they are moccasins with feathers on them.
I have a weakness for eggnog, specifically the store bought kind. The moment it appears in with the milk, I must buy it. It goes into my coffee, I drink it at any opportunity, I even put it in tea. My father recently suggested that we buy it by the tanker truck.

The coffee thing comes from a long time ago. When I was in law school, I was first properly exposed to Starbucks as a viable coffee option. Until that time, I had lived in an area where only independent coffee shops were available. I still prefer them for a cup of coffee or even an espresso based beverage...but there is something absolutely addicting about knowing that no matter where you are, that craving you have is about to be satisfied. I was quickly craving the cinnamon dolce latte and rarely strayed form my favorite.

Then the holiday season rolled around. I firmly stuck to cinnamon until one day I succumbed. On of my friends was as passionate about eggnog as I, and he was so very excited about the eggnog latte then offered that I found myself trying it. It was delicious. It also reminded me that eggnog can go in anything.

One little secret I have is that when it is holiday season and there's eggnog in the fridge, I substitute eggnog for half of the milk in my pumpkin pie filling. Soon, I found myself trying to sneak eggnog into everything. The biggest hit amongst the law school crowd {upon whom I fobbed off all possible results of my stress baking} were these eggnog sugar cookies. They are a variation on my favorite cracked sugar cookie recipe, as are my dark chocolate chunk cookies, and a most delicious one at that.

This is a truly simple recipe, requiring only a bit of creaming, stirring, and nutmeg grating, a perfect throw together addition to Christmas cookie lists and accompaniment to the Thanksgiving dessert table.


Eggnog Sugar Cookies
3/4 cup shortening
3/4 cup sugar
1 egg
vanilla
1/2 cup eggnog
1 tablespoon rum {or} 1 teaspoon rum extract

2 and 1/2 cups flour
1 teaspoon baking soda
1/2 teaspoon cream of tartar
1/2 teaspoon fresh grated nutmeg
1/4 teaspoon cinnamon
1/4 teaspoon ginger
pinch of salt

1/4 cup white sugar & 1/4 teaspoon grated nutmeg for rolling

Cream together the shortening & sugar, then add the egg, then the vanilla and eggnog, and finally the rum or rum extract {bourbon is a good alternative, as is leaving out the alcohol or extract altogether if you desire}.
In a separate bowl, whisk together the dry ingredients, then add that mix to the wet mixture in several batches. You will want a soft dough that is dry enough to handle, but damp to the touch. Roll heaping tablespoonfuls into balls, then roll in sugar. Place on a cookie sheet with two inches between each ball, then bake in a preheated over at 350 degrees for 10-14 minutes, until lightly golden around the edges.
There should be a slight resistance when touched on the top to indicate doneness, but do not allow to become firm unless you prefer a crunchy cookie. I do not. Cool on paper towel covered cooling racks as long as you can keep from eating them.
This recipe makes about twenty large cookies, or nearly three dozen smaller cookies {if dough is measured in flat tablespoons before rolling}

"Be well. Do good work. Keep in touch." - Garrison Keillor

17 September 2012

lemon meringue pie; or a final bit of cooling as summer nears its end

finally, we come to what my family insists is the best pie I ever made: the Lemon Meringue Pie for the To Kill a Mockingbird Book Club southern supper. Actually, I'm really craving some of it right now nearly a month after we actually had book club.

The weather cannot seem to make up it's mind right now: autumn or summer, autumn or summer, back and forth from furry slippers to sandals, tennis dresses to scarves and sweaters. One day all I want is hot apple cider and ginger cookies, another I dream of watermelon cocktails, chilled rose wine, and this.

To be fair, I usually do not enjoy lemon meringue pie. I have no idea why, but it make have to do with the fact that out typical lemon filling recipe is not as rich as this one. I remembered the rich, thick, tart lemon curd in the lemon-lemon-lemonx4 cake I made for Easter. This is what happened. Alas, it happened too quickly, and was eaten in moments, so Instagram is all the record I have remaining.

Lemon Meringue Pie
the only difference between this pie and Coconut Cream is the filling. Follow all the directions through the link, substituting the following filling:

1 cup sugar
1/3 cup cornstarch
1 and 1/2 cups water
1/2 cup lemon juice
zest of two lemons, grated

5 egg yolks, beaten
1 tablespoon butter

While the pie shell is baking, mix together the sugar, cornstarch, water, lemon juice, and lemon zest in a large saucepan. Once mixed, heat over medium heat while stirring until it thickens and boils. Boil for one minute, then remove from the heat.
Mix half of the hot mixture into the egg yolks, a large dollop at a time. If you just dump the egg into the hot mixture or vice versa, you will scramble the eggs. Mix the egg & thickened mixture back into the rest of the cooked mix in the saucepan and return to medium heat.
Bring back to a boil, constantly stirring, then cook for another minute. Remove from the heat again, stir and melt in the butter, then pour into the pie shell. You may feel the need to add a drop or two of yellow food coloring for a vibrant yellow filling, though it is not always necessary.
For further directions, return to the Coconut Cream Pie directions, omitting the sprinkling of flaked coconut onto the meringue before toasting.


"Be well. Do good work. Keep in touch." - Garrison Keillor

14 September 2012

skillet fried chicken; or why you should keep your grandmother's cast iron

there is a constant refrain that cast iron is too difficult or fussy for the modern kitchen. I hear terrible stories of people preferring non-stick things skillets that require only wooden or plastic utensils, lest the coating come scrapping off into your food. Cast iron is old {I bet you have one that was your grandmother's, languishing in your cupboard} for a reason. It works.

True, you can't throw it in your dishwasher. However, you just need to throw it in some soapy dishwater, rub it out with a dishrag, or attack any crusty bits with a metal or sponge scrubby. Rise, heat on the stove until the moisture steams away, then put it away. Nothing to it. Soap won't hurt it. You might want to oil or season it, but that's what cooking does.

I cook almost exclusively in cast iron. Exceptions: boiling water, boiling gravy, boiling vegetables. You can use it for those, too, but a pot makes for a bit easier use. Still, even with all the things I use my great-grandmother's cast iron skillet for {bacon! steak! onions! stir-fry! eggs! pressed sandwiches! pancakes!} I'd never fired chicken in it. We have an electric frier for that sort of thing.

Then came our To Kill a Mockingbird Book Club southern supper meeting. It is traditional in the South to fry chicken is a cast iron skillet, turning once or twice until the chicken has a crispy crust and is done through. It is tradition, so I wanted to try. {that, and there is a pivotal and delightful scene in Justified where Ava offers to cook fried chicken for Raylan, only Boyd shows up instead...a lip-licking Timothy Olyphant is delightful and delicious. see also my "television: mad men vs. justified" post} I really wanted to try.

So I did. I broke out the cast iron, slightly modified our typical fried chicken, and fed the girls something finger lickin' good.


Skillet Fried Chicken (feeds four)
4 deboned chicken breasts, with the skin still on, butterflied (or four pieces of your choice)
2 cups whole milk
juice of 1 lemon
1 egg

1 cup cornmeal
1 cup flour
1 teaspoon chili powder
1 tablespoon cracked pepper
1 tablespoon salt

1/2 cup canola oil
1/2 cup shortening
1 tablespoon butter

mix together the milk, egg, and lemon juice in a casserole dish, then add in the chicken pieces. Refridgerate, covered, for at least one hour, up to eight hours.
Heat up the oils in the skillet {12 inches in diameter. If your skillet is smaller, use less oil and cook the chicken in batches} until they snap back when a drop of water is added.
Mix the dry breading ingredients in a set of doubled grocery bags. Dredge the chicken in the dry ingredients, then place gently in the skillet, skin side down.
Flip each piece after fifteen minutes, then check doneness after another ten. Depending on the amount of chicken in the skillet and the heat of your oil, the total cooking time per breast will vary from twenty minutes total to nearly forty minutes. Continue to turn the chicken to keep from burning any one side. The juices will run clear when the meat is cooked.

"Be well. Do good work. Keep in touch." - Garrison Keillor

05 September 2012

snow; or how a hot apple pie heats the whole house, inside out

{somehow, this post moved it's way up to the top of the blog, from way back in December. Interestingly enough, I did bake an apple pie today...along with the watermelon margaritas featured below.}

finally, it's snowing the first local snow of December just outside my window. There are big, fat flakes all full of water and holiday spirit just tumbling out of the sky. Alas, they aren't accumulating on anything beyond porches just yet. Living where I do, a white Christmas happens about seventy percent of the time. I genuinely like winter for the most part, as the local countryside is gorgeous so long as it has help from Mother Nature: we need the big green leaves of summer or the brilliant autumn shades or the soft heathered white of snow and clouds to make it pretty. There aren't enough evergreens to cover up the sad, lonely branches of deciduous tress when they've no leaves to cover them, unless they are providing a beautiful contrast for white snow and the purple haze of twilight.

Still, snow and cold make for red noses and cold toes, the sort of thing that requires warm food and warmer homes to take the chill away. I know it's not apple season anymore and that we are all supposed to be buying and eating food locally and in season...but the damn things last so very long in the refrigerator! Seriously, shove six or so apples int eh back of your fridge and two months later, they're still great for applesauce or pie. Even better, peel ones you know you won't eat, cut into quarters & core {you know, like you were about to put them on a plate and eat them}, then toss in a zipper bag and into the freezer. Good basically forever.

cough. Back to the point, winter is cold, people like to hibernate and eat warm things, turning the oven on is a good.thing. Plus, apple pie gives you some extra fruit in a diet of hot chocolate and fondue.

Apple Pie
6 or 8 large apples
3 teaspoons ground cinnamon
1 teaspoon fresh grated or 1/2 teaspoon ground nutmeg
dash ground ginger
vanilla
1/2 cup sugar (white or brown or a combination)
2 tablespoons cornstarch
1 or 2 tablespoons molasses (optional)

This pie crust recipe. Don't read if you have a general affinity for frozen pie crusts, as I come down on them pretty hard...also you should read if you have an affinity for frozen pie crusts as I explain how easy it really is to make one at home and how you really.shouldn't.ever. use frozen pie crusts.

Peel, quarter, core, and slice (each quarter should be cut into about four pieces) the apples into a large bowl, then add the spices, sugar, etc. Toss together and set aside. Preheat your oven to 400 degrees, then prepare the above pie crust, or one of your choosing {you have no idea how difficult it was to write that sentence}. Take have the pie dough, rolling it to fit your pie pan (a nine inch glass one seems to work best), then placing it into the bottom of the pie pan. Fill with the apples, then roll out the other half of the dough to cover the top. Pinch the edges together to seal, then cut or poke steam vents in a {preferably} pretty pattern on the top. I sometimes sprinkle a tablespoon or so of sugar on top, but it isn't necessary.
Place the assembled pie onto a sprayed cookie sheet. You'll need one with stand-up edges, as this is used to catch any overflowing apple juice from the pie. Some apples are juicier than a couple tablespoons of cornstarch will handle, others may not overflow at all. Place the pie into the 400 degree oven for about a half hour, then reduce the heat to 375 degrees for the final half hour. At the heat reduction time, it is usually helpful to place a pie crust shield over the outer edges of the pie. If you don't have one, take three or four short strips of aluminum foil, folding them together to form a circle to place over just the outer edges of the pie crust. It will keep those edges from burning before the apples and bottom crust are baked.
Sometimes the pie will take a bit more than an hour, depending on your oven and the sturdiness of the apples. Check to see if the bottom crust is golden brown and if an knife inserted discretely into the top of the pie feels as though the apples are not resisting. Allow to cool, then serve with ice cream, milk, cheese, or whatever you like.

"Be well. Do good work. Keep in touch." - Garrison Keillor

hurricane; or how late summer cries out for watermelon margaritas

lately, the remnants of Hurricane Isaac have been dumping all sorts of tropical heat an humidity on my foresty little world. It has been a long and {thankfully} incredibly busy summer in the store, and while I usually adore my Cook Forest wear, from tank tops to tye-dye, I'm ready for autumn. I'm ready for sweaters and scarves and furry booties. Last year around this time, I was whining that it was hot while I wanted to bake Molasses to Rum to Slaves cookies. I broke out the cotton dresses and had a blast.

This year, I'm relying on chilled, pureed fruit to get me through this early September heatwave. It has been just hot enough lately that the entire family is getting on each others' last nerve, and all I see from my European friends are tweets about rain and sweaters. It's enough to make a girl go spare. Instead, tonight, Mom and I settled into my barely cool apartment with icy fruity drinks and some of the best the BBC has to offer.

We adored Downton Abbey {who didn't? I'm dying for the Ralph Lauren AW12 collection of tweed and newsboy caps}, so we dove back a bit further in time to explore Cranford. I saw the first season the first time around but managed to miss the Return to Cranford, so in a few weeks we'll both be enjoying something new. Cocktails all around, though Miss Deborah Jenkyns would never approve of ladies consuming alcohol. Good thing we're not really ladies, then.


Watermelon Margarita
As with most mixed drinks, it's really about proportions to your taste. I used about 3 cups of watermelon chunks, pureed, with 4 shots of tequila, a heavy splash of sweetened lime juice, and a handful of ice cubes. Salt or sugar the rims as you like. Altogether, we had two smallish drinks each. Blenders are one of the greatest inventions ever.


"Be well. Do good work. Keep in touch." - Garrison Keillor


18 July 2012

weddings; or how strawberry hand pies make it to a bridal shower {+ sangria}

this post really ought be about hubris. I mean, really, really ought be about hubris. See, I've this nasty, egotistical habit of mentally planning a new recipe, writing the post {including the recipe & directions}, then making the recipe, taking pictures, and posting. Today was much the same as usual, except hubris got me in the end.

I was happily mixing and rolling and dolloping pie dough and filling earlier, except the edges weren't sealing. Nothing was working right: too much filling, too wet dough, everything that could go wrong was. You'll see in a minute, these were special tiny pies and have to be as perfect as possible. I felt like a lot was riding on these pies. They just weren't living up to expectations. I got mad, threw a couple away, cursed, swore, and vowed to just do simple things in the future. So, I threw what I had done in the oven and went about simplifying everything into tiny, normal, tarts. Then I discovered that what I thought had turned out terribly and were going to have to go to the family instead of an event turned out pretty darn well.

Hubris. I was too cocky to begin with, too easily frustrated, then everything turned out just fine...and now my sister has two versions of the same baby tart for her bridal shower this weekend. De-stressing with some sangria now as I edit the pictures and remember life goes on, no matter what. Let the previously written blog post stand!

love, honor, excitement, desperation, ooh, what do I wear?! all of these things slid through my mind in the moments after my best friend/sister asked me to be the maid of honor for her upcoming nuptials. What I forgot to think about was the necessary planning of a bridal shower. My only girl first cousin is seven years younger than I, I have no siblings, and, for my entire life, the busiest months of the year for my and my family's work are key wedding months. I spent little time in my super girly, super tomboy {tree climbing & wire walking, backyard camping & gardening, all while wearing flowered dresses and ribbons in my hair} imagining the perfect wedding.

Maybe I thought about dresses, but once I got the age where most girls start thinking about the planning, I wasn't really attending weddings. Still, I'm so happy to share Sari & Brett's big day with them. It's just the bridal shower that freaks me out...did I mention that there are two? Locations require a Midwest shower and an East coast shower. Thankfully, there are two Maids of Honor and my co-chair is a planner of spectacular cuteness. I plan on stealing her ideas, as the first is this weekend and mine doesn't occur until September.

Alas, that aforementioned work schedule hasn't changed. I cannot make the Midwest shower, much as it kills me. But, I can help. My Matron of Honor originally asked that I make those PB&J pies on a stick that are all over Pinterest. Except, I can't find popsicle sticks. Anywhere. and, the girls are traveling through Thursday. Hand pies it is. I may possibly have played around with the recipe, or entirely disregarded everything that has to do with Pies on a Stick except the pie part and the jam part. Instead, we have strawberry jam and almonds and dried dates. I would have used any of a long list of artisinal jams we sell in the store, but the bride wanted strawberry, so strawberry it is.

Strawberry Hand Pies
Filling:
1 jar (about 16-20 ounces) strawberry jam
2/3 cup slivered almonds
1 package (8 ounces) whole dried pitted dates, roughly chopped

Dough:
1 batch Basic Pie Crust, only instead of plain water, add
1 teaspoon vanilla extract
1/2 teaspoon almond extract
to the water used to mix the dough

Egg Wash:
1 egg
1 tablespoon water
beat together

mix filling in a medium bowl and set aside. Mix the dough as directed, then roll out thinly. Cut into two or three inch circles, placing about 3/4 teaspoon filling in the center of each. Brush a bit of egg wash around the entire edge of the circles.
Gently pick it up, folding the circle in half as you do so, then pinch together the edges from one corner across to the other. Take the two pointy ends and tuck together, turning the entire hand pie into a circle again. {this is the same method used to make the Khinkali meat dumplings, though the dough and filling are, obviously, different. As a recap: Fold it over, pinching the dough around the edge into a half moon shape. Be certain to seal the edges well. You will likely find that you have put too much filling on the first few, I always do. Once you have sealed the edges, flip the dumpling so the the straight edge is on top. Pull the two points together, pinching and sealing the entire way around. It will look like an overlarge tortellini. I think the finished product looks like a bellybutton.}
Place on a sprayed cookie sheet as competed, then brush the top of each with more egg wash and sprinkle sugar over top. Poke two or three small vents in a pattern on the top of each pie. Bake in a preheated 375 degree oven for about 15 minutes. Remove from the cookie sheets with a spatula to a cooling rack before eating, as the molten jam in the center will be extraordinarily hot.
For the easier version, cut the dough out as directed, then stretch gently and press into the previously greased cups of a muffin tin. Fill with a tablespoon or less of the filling and bake at 375 for about 15 minutes.


"Be well. Do good work. Keep in touch." - Garrison Keillor

PS after a lot of hits from a simple little "red wine sangria" pin on Pinterest, I figure I'd better update with how I made mine.

1 glass Spanish red wine
small handful of frozen blueberries
small handful of frozen raspberries
5 Bing cherries, cut in half & pitted
splash of Chambord
splash of lime syrup

allow to stand in refrigerator for at least 2 hours, then add:
ice
enough seltzer or club soda to fill the glass to the brim

11 July 2012

neighborliness: or how zucchini blossoms into bread for the whole neighborhood

it is that time of year again. Summer is in full swing, and I am wondering why I did not plant a garden. herbs! fresh tomatoes! how delightful! teeny, tiny, baby carrots! zucchini! oh, wait. That is why I did not plant a garden. If you grow one zucchini plant, you will have enough zucchini to give to your relatives, friends, acquaintances, and strangers on the street for months. Twice this week the same neighbor has brought us five zucchini. He is usually overwhelming in neighborliness, as we let him use our land to plant corn and sunflowers and raise a cow to two and pigs or six. That results in half a cow's worth of beef and far more sausage than any one family might eat.

Still, everyone I know is on the hunt for different ways to use zucchini without everything tasting like zucchini. We grill it, last night I roasted it with tomatoes, carrots, green beans, olive oil, cumin & chili powder, any way you want it, just to keep it from going to waste. In the annals of Reid family recipes, gathered in binders, old fashioned recipe boxes, and on this blog, we have multiple zucchini recipes. This one may be my favorite. Recently, it masqueraded as a delicious Banana Bread recipe, but one substitution and three additions turn it into a tender bread of the sweet and flavorful variety. I doubled the recipe so as to share {and pass on the constant zucchini wares}

Zucchini Bread (two loaves)
3 tablespoons milk
1 tablespoon apple cider vinegar

1 cup butter, softened
1 cup white sugar
1 cup brown sugar
4 eggs
vanilla

4 cups flour
2 teaspoons baking soda
1 teaspoon baking powder
1 teaspoon fresh grated nutmeg
1/2 teaspoon salt

4 cups shredded zucchini (about 2 or three medium zucchini)
1 cup chopped pecans (if desired)

Mix together the milk and vinegar, let sit aside. In a large mixing bowl, cream together the sugars and butter, then add the eggs, milk mixture and vanilla individually. Next add the dry ingredients. Finally, stir in the zucchini.
{It is often easier to peel and shred the zucchini first, letting it sit aside to drain out the excess water. I personally do not mind leaving the skin on, but many people don't particularly care for green bits in sweet bread. You can use a knife or vegetable peeler, but one's knife skills only become better with practice, so I suggest practicing on zucchini. If you have extra shredded zucchini, just pop it in a zipper bag and freeze, then you'll have wintertime zucchini.}
Once the batter is combined, divide evenly and pour into two sprayed/greased glass loaf pans {9x3.5x5 or so}. Bake in a preheated 300 degree oven for 90 minutes. yes, and hour and a half. minimum. Two weeks ago, the banana version of this recipe took 85 minutes. Today, the zucchini took an hour and forty-five minutes. When an inserted knife comes out clean, remove the pans from the oven and run a knife around the edge. Jiggle the loaf pan up and down to see that the loaf it loose, then invert and slide the loaf out. Allow to cool at least marginally before slicing, slathering in butter, and eating.


"Be well. Do good work. Keep in touch." - Garrison Keillor

27 June 2012

leftovers; or how blueberry wheat muffins keep me from throwing things away

breakfast is my favorite meal of the day, which is why I yell at people who skip it. Granted, there's all this science about breakfast being good for you and good for those who want to lose weight, so your body can get on with the burning of calories instead of just storing things because it's not actually getting fuel in the morning, but it's really all about how I get cranky when I don't eat. My sister can attest to this, as she is one of those people who doesn't always feel she has time for the morning meal and goes without. When we travel, if we get up late or end up on some jaunt that takes too long to get me to breakfast, she knows precisely when it's time to stop looking and instead start feeding.

Even with my love of a multi-step breakfast {runny egg yokes! espresso! fruit! waffles! homemade granola on yogurt! a pot of tea! oatmeal!} I do my fair share of cold cereal in the morning too. Sometimes it's just quicker, sometimes I don't want the bother, and sometimes it is so hot that anything beyond icy milk and frozen fruit on something grain-y sounds like a very bad idea. I also don't like super sweet things in the morning. Some honey on my yogurt or oatmeal is plenty. I like pancakes and waffles, but there had better be some tart fruit and bacon to balance that syrup.

Some of my dear friends will happily eat dessert for breakfast: cookies, cake, even ice cream. I can't do it. Pie, maybe a fruit variety, that's as close as I get. I'm especially bad when I've made plans with a friend to go walking once a week this summer...if we're going to be using calories, they should be good, filling ones like eggs and fruit or a homemade muffin or maybe yogurt & fruit or a good for you cereal.

For me, then, it is cereal like raisin bran, lightly frosted shredded wheat, those little oat squares. Nothing too sweet, something filling, even a little healthy. But there's a downside to my shredded wheat standby: all that extra frosted wheat bits in the bottom of the box. My sad little faux-fifties {actually, mid-eighties, early nineties, but who is quibbling?} era upbringing next door to Depression-era grandparents means that I can not stand the idea of throwing those bits away.

They might be useful! I could eat them instead of the squares for breakfast! There is nothing wrong with them! I'm also the girl who in law school froze milk in ice cube trays because it was a couple of days from going bad, and I couldn't drink it all, but could use milk cubes in my coffee instead of milk. So, I've got all these little bits of frosted mini-wheats hanging out in a container in my cupboard. I've also got a lovely Banana Bran Muffin recipe. Just no bananas. and no raisin bran. I do have frozen blueberries and Greek yogurt. A muffin marriage said its vows.

Raspberry Wheat Muffins
2 cups discarded frosted shredded wheat (or raisin bran)
3/4 cup milk
1 egg
2 tablespoons oil (canola or vegetable)
1/2 cup unflavored or vanilla Greek yogurt

1 cup flour
1 teaspoon baking powder
1/2 teaspoon baking soda

1 cup frozen blueberries or raspberries (still frozen)

Mix the wet ingredients with the shredded wheat and allow to stand for ten minutes. {If you substitute the raisin bran back in or use unfrosted shredded wheat bits, add 1/4 cup brown sugar. Since my shredded wheat was frosted, I needed no extra sugar.} Then add the dry ingredients and mix. Finally, gently mix in the fruit. Don't bother defrosting, as leaving them frozen will allow the berries to keep their shape better. Scoop into paper lined muffin tins and bake in a preheated oven at 400 degrees for about twenty minutes.
It's the perfect sort of timing to toss the muffins in the oven, hop in the shower, and have breakfast nearly ready when you've gotten back out. These are a somewhat chewy muffin, due to the yogurt. You could also always sway the 1/2 cup mashed bananas back in instead of the yogurt for a more traditional texture.


"Be well. Do good work. Keep in touch." - Garrison Keillor